Tuesday, September 26, 2006

Mock Dash Layout


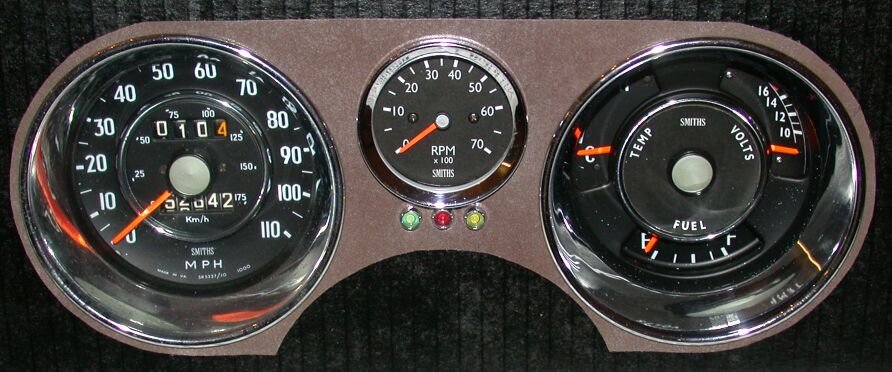
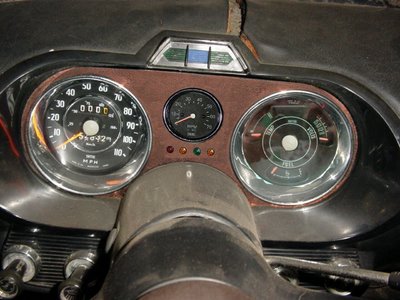
Doug's been busy again. At the same time that I was trying out a pattern for the "new" gauge section of the dash, he was putting the reworked gauges into a mock dash setup for my approval. Needless to say, he got it!

Tuesday, September 12, 2006

Time for an update!


From left to right:
Existing speedometer, cleaned up
Tach, created from scratch including "SMITHS" face
Triple gauge, with voltmeter replacing amps.

WOW!

And these aren't even the real faces yet...just paper copies temporarily placed.

I can't thank Doug enough. Next, we're (he's...I'm just support) taking on converting one of the rectangular MGB oil pressure gauges to look like these and mounting it where the ash tray used to be...

Here's the picture of the finished transmission I forgot to take and load last time...


Believe it or not, this is the rusty remnants of the pins and spring clips that held the pads in place in the Stag calipers. You can imagine what the calipers looked like. They've been cleaned, I've bought some used but good pistons to replace the corroded originals that have been removed, and I'm awaiting a seal kit to try to rebuild the calipers. We'll hope that I can get by with a rebuild as a professional sleeving job is really expensive (although nice!).


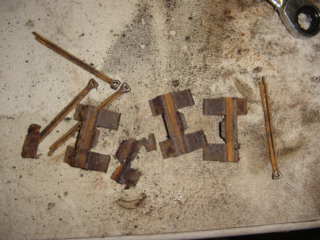
Finally, here's the gutted engine compartment. I have to decide what color the car will eventually be before putting the engine in so that I can paint this properly. Right now, since I must stay with the red interior, I'm leaning towards a creamy white or dove gray (grey?). Any votes out there, or other suggestions???
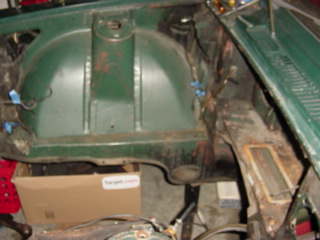


Jamie

Tuesday, August 29, 2006

More work done...

Finished the tranny (but forgot to take a picture of the completed assembly!) O/D installed, additional switch added to top cover (who has a 5/8-13 tap anyway?...thankfully, a metric one was close enough)


Here's the next rebuild job: a set of Stag calipers...at least I was able to obtain a set of good pistons for them on eBay...


Finally, a shot of the rear of the car. All the bins in the rear are filled with parts!

Tuesday, August 15, 2006

Pictures (2nd try)

Ok, here are the pictures I was having difficulty posting...

First one is of the sending unit before Doug's cleaning/refurbishing. Second, one of the disassembled triple gauge, fuel gauge that's being turned into a volt meter, and you can see the cleaned (and now functional!) sending unit in the background. Finally, the "new" gauge temporarily put into place.

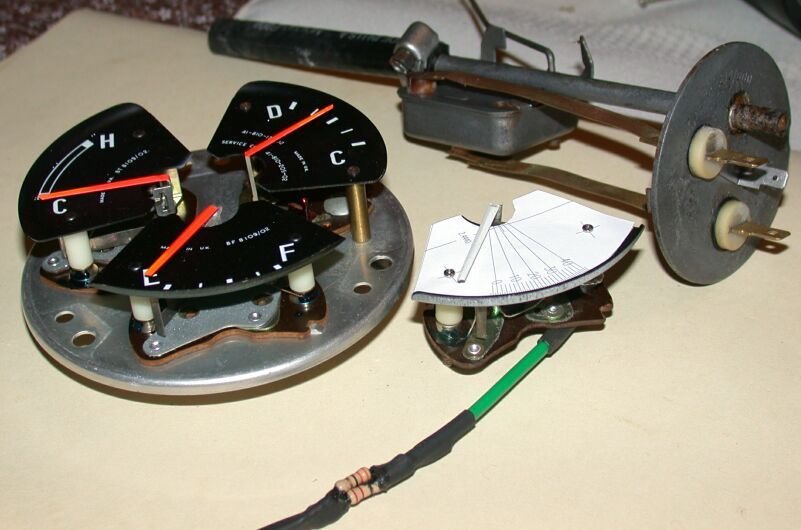
Doug has replacement graphics for the face and gauge planned. He really does phenominal work! By the time we have the 2" tach in place, the only other gauge I'd like to have is oil pressure. Since I don't smoke, maybe we can do something with the ash-tray part of the dash...

Jamie


Saturday, August 12, 2006

Miscellaneous Update

Not much progress as far as assembly goes...but...lots of parts acquisitions and some dash/gauge progress (thanks to Doug!). First, current assembly state.

This is the rough order of what I have to do to get the car back on the road (feel free to object/correct/suggest through comments!)
  1. Finish assembling the tranny (top cover/OD/nose)
  2. Pull already rebuilt TR6 engine from TR6 and put front plate & sump from 2500 on.
  3. Marry up engine/clutch/tranny
  4. Clean up and repaint underhood area (means deciding color for car, see below)
  5. Mount engine/tranny from underneath
  6. Re-install already rebuilt front suspension
  7. Install driveshaft coming from California (a deal I couldn't refuse, was planning on making one up)
  8. Turn used Stag rotors, rebuild Stag calipers and install front brakes
  9. Replace rear shoes/wheel cylinders/drums as necessary (have all 3 new)
  10. Replace flex brake lines
  11. Modify Mk. II RHD gas pedal to fit LHD Mk. I (may be interesting...)
  12. Coat fuel tank with liner after shaking chain for a while to break loose crud & clean
  13. Reinstal fuel tank and refurbished sender (thanks Doug!)
  14. Have radiator re-cored for increased cooling, because...
  15. the next step will be to install the new heat/A-C system (R-134) that Dave and I are designing
  16. Mount master cylinders/slave cylinder (have all new or rebuilt) and connect/fill/bleed/fill/bleed/fill/bleed/etc...hydraulics (DOT5, I'm not going racing)
  17. Rebuild HS 6 carbs (have kits) and install w/exhaust manifold
  18. Trailer to local custom exhaust shop for fabrication/installation
  19. Reinstall front seats and install new seat belts front and rear (already have)
  20. Cover split vinyl on top of dash and install new dash center/gauges/radio/etc
  21. Debug electricals (this could take weeks...I've never even hooked up a battery at this point)
  22. Debug engine/mechanicals (if there is a major risk here, it's the differential/halfshafts, I'll look at the halfshafts while underneath and do U-joints if needed, but I'm not touching the diff...car had 57k miles so I'm trusting it's OK)
  23. Any minor interior cosmetics
  24. Blast TR6 wheels, paint, buy/mount/balance tires
  25. Replace center emblem in TR6 centers and install
  26. Install new wiper arms/wipers (already have)
  27. Install bumpers
  28. I'm sure there's stuff I'm forgetting, I reserve the right to edit this post!
  29. Install child seat and let's go Triumphing!

Now, as to color choices. As previously posted, I just can't get into the green and red combination. Since I have a new red carpet set that came with the car, and the front seats are largely newly reuplolstered in red...and the rear seat is still in original red leather...I think I'm stuck with a red interior for the forseeable future. I'm thinking that leaves me with a limited selection of colors, especially since the body has some waves....so right now the leading candidate is a two tone combo of red roof/off-white body, using period colors. What do you think?

Parts...I've gotten a lot since my last post. For example, a NOS 2500 O/D shift lever (eBay), a pair of sidelight lenses (a kind-hearted British saloon enthusiast), speedo cable, NOS bumper overriders, Lucas Square 8 driving lights, front wheel bearings, strut gaiters, u-joints, rear window heater kit, lug nuts, tie rod ends, side mirrors (all eBay) have all found their way into the garage.

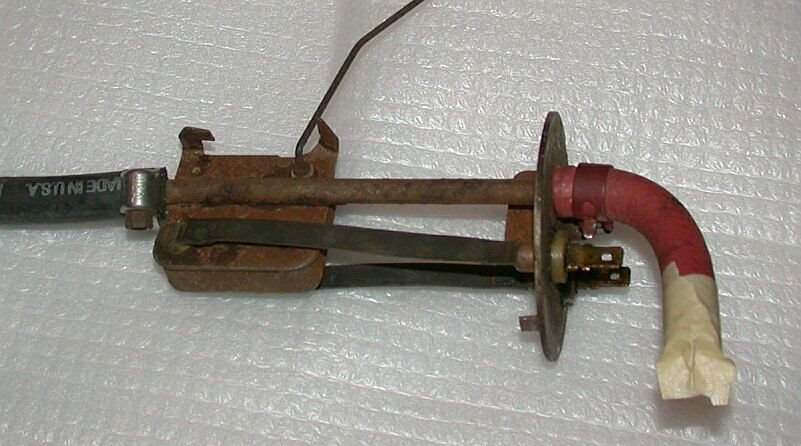
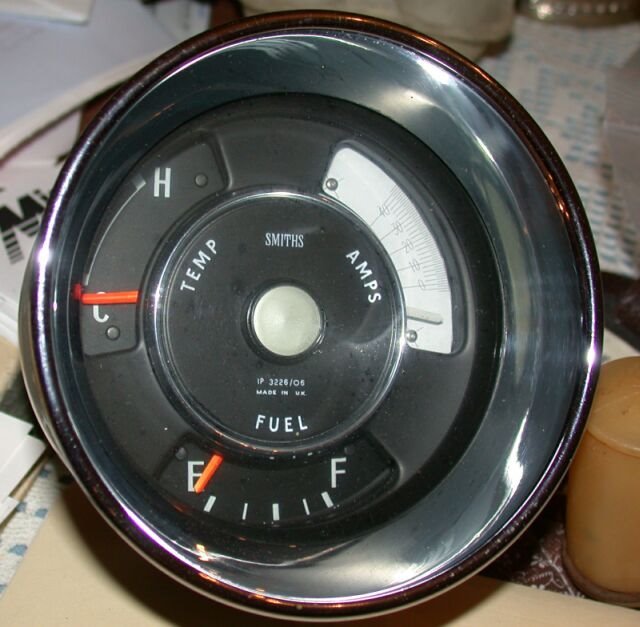
Finally, here's some of the work Doug's been doing on the gauges and dash. He's found that the triple gauge I purchased (supposedly from a later 2000) isn't exactly the same as the original, so we're going to have to create a voltmeter from another gauge. The pictures explain it better than I can, but I can't get it to load tonight. So I guess that will have to wait for next time!

Wednesday, July 26, 2006

Tranny update, gauges, another 2000 on the road and other parts

I've only been able to work on the car one day since the last post, but it was a GOOD day. My friend David came over and after re-arranging engines on engine stands, we managed to get the majority of the transmission assembled with new bearings and layshaft. David was particularly resourceful in figuring out a way to press off and install the new bearings with a homemade Spitfire spring compressor (I don't have a hydraulic press). All I have to do now (besides finding some time) is install the top cover, nose piece and overdrive (already assembled).

Another friend has helped me with the lack of a tachometer. Doug has created a "concept" dash for me and is helping me understand the details of what it will take to add a tachometer. Doug has converted many old mechanical gauges to electric operation and has restored his wife's GT6 Mk. I and a beautiful Mk. I Mini Cooper S. His Mini sports a gauge where he even made the gauge facing himself...but you can't tell it from looking. I hope mine turns out 1/2 that well. Here's Doug's concept of what our wood insert will look like...


We're hoping that the gauge on the right, which the seller on eBay said was from a 2000, will fit with the bezel from the original triple gauge as it would allow me to have a voltmeter rather than an ammeter. I've always felt more comfortable without all those amps flowing behind the dash. The center gauge will be a construction of Doug's, made to look like a period Smiths-type gauge. Wish us luck!

Other items I've recently acquired for the car include a period Smiths rear window defogger kit that looks too good to use, a set of NCSU floor mats to match the red interior carpet, new seat belts for both front and rear, a set of Lucas "square 8" driving lamps to get some light on the road and an original set of microfiches for early, mid and late 2000/2500/2.5PI cars and a microfiche viewer (thanks craigslist!)

Finally, Steve has his 2000 Mk. II on the road and recently attended the VTR National Convention in Ft. Worth, Texas. We missed getting together on his way back but hopefully that will happen soon!

Jamie

Tuesday, June 20, 2006

Gee, it's been a month. Some progress!

I didn't realize it's been almost a month since I last posted. Must have something to do with spending a week at the beach and having a 13-month old running (!) around...
But yes, there has been some 'Triumphant' time as well. Progress includes:

Standard TR6 tranny has been disassembled, cleaned, and rebuild parts ordered. The internal components of the tranny are the nicest I've ever seen. I almost didn't have to replace the countershaft (!). However, someone in the TVR's history must have loved to hang their hand on the shifter when in fourth gear, because the shifter fork is really, really worn. One's been ordered from TRF, along with many other items.

Front struts, brake drums and shoes, and numerous other eBay purchases have been received and prepared for installation. I'm happy to say that everyone I've dealt with on eBay for parts for this car has been super.

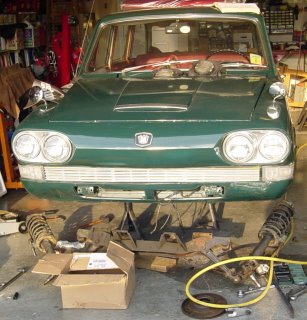
As you can see, there's plenty of parts on the car...just not INSTALLED on the car!

As a side note, we in North Carolina are very proud of our 2006 Stanley Cup Champion Carolina Hurricanes! I admit freely to watching games rather than working on the car... :-)

Tuesday, May 23, 2006

39-Year Old Assembly Error Found!


Boy, I'll bet this car had some creaks and groans in the right front! As I took apart the fourth strut assembly (two from the Stag parts from Dave Crane, two from the 2000) this Sunday, I noticed that the top of the strut assembly looked a little different than the others. Apparently, some Triumph assembly line worker was a little off the mark with his placement of the rubber pad that goes between the spring and the upper spring rest.

In case you can't tell from the picture, the ring was fitted ABOVE the spring rest. It's in perfect, un-blemished condition after 39 years of being totally useless. The metal-on-metal spring to rest contact, however, left a lot of iron oxide particles...

Here's another shot with me holding the ring (to left). The stuff that looks like cotton wool is various insect nests/egg sacs....soon to be gone.
One of the things all this disassembly means is lots more parts to beadblast. Here's some of what I'll be trying to get blasted soon:
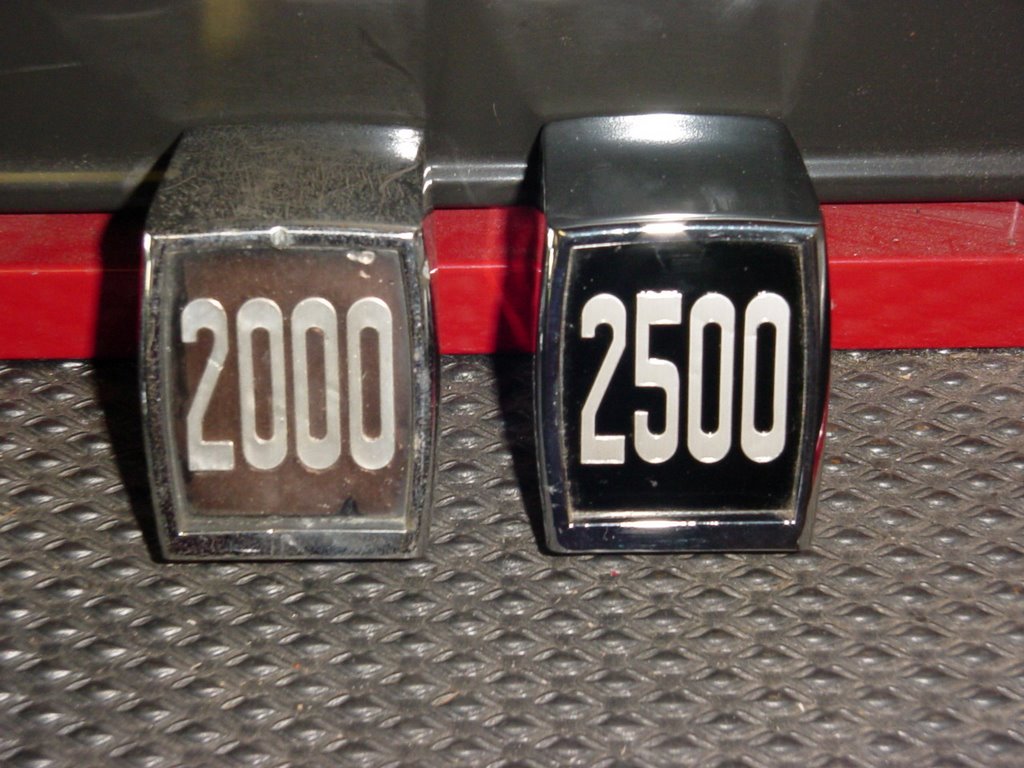
Finally, I splurged! I really didn't want to bolt that rough looking badge on the left to the rechromed bumper...so...look what I found on eBay! NOS, it even has the right badge in it, now that the TR6/2500S engine will be going in... :-)

Oh well...still searching for some more time. I did manage to drain the tranny as well; it already had a magnetic drain plug (some crud attached, but nothing to worry about) and had pretty clean oil. Next step is to get in and find out what I need to replace (besides the inevitable countershaft and cluster gear bearings...) Guess that's all for tonight. Hope to see some more comments!

Tuesday, May 09, 2006

More progress...albeit slow progress!


I realized that I had neglected to post that the overdrive and mainshaft had arrived from Ian in New Zealand. Ian has previously provided overdrive conversion kits to two of my friends, and they're both happy, so I expect things to be fine with Chrissy's conversion. Ian also supplies 2000/2500 parts, so if you're in need in the land of OZ, drop him a note. Ian's e-mail is roslian@xtra.co.nz. You can see the overdrive to the left.

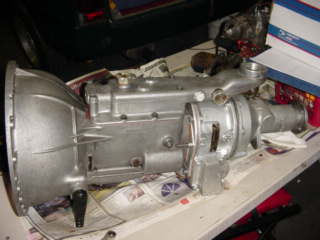
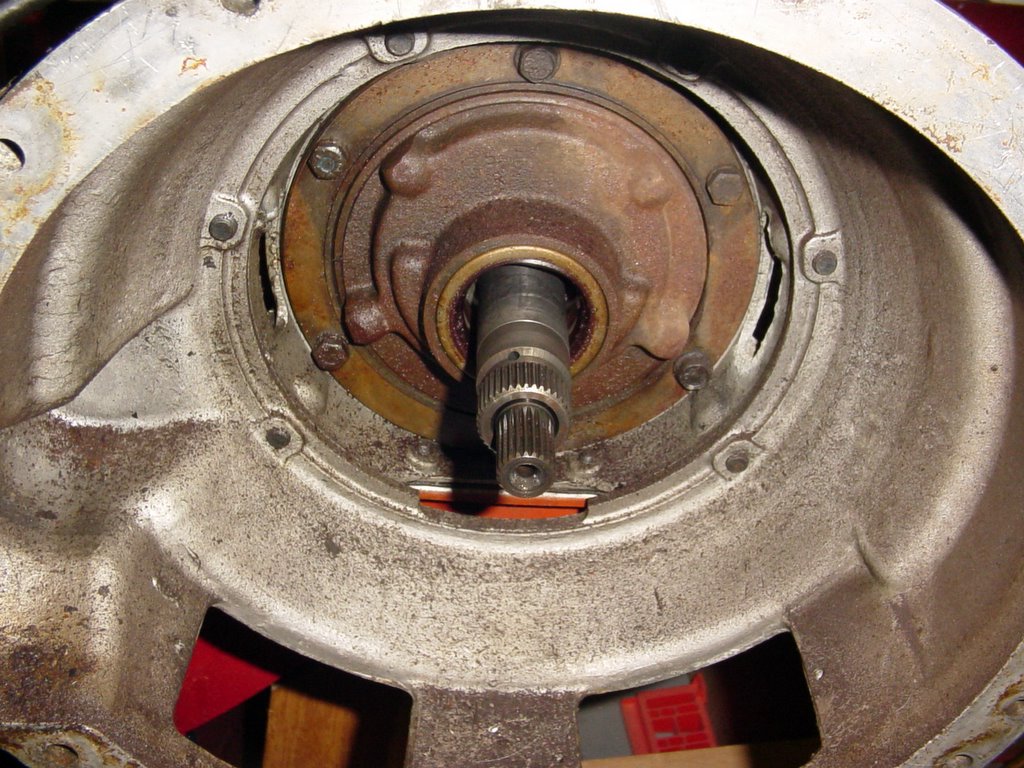
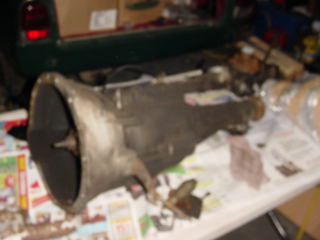
And here on the left is the transmission it will be mated to. I've rebuilt Triumph TR and Spitfire transmissions before, so this shouldn't be too difficult. I'm going to wait until I've cleaned and stripped the transmission down before I order parts...I'm sure I'll need a layshaft and countergear bearings...the rest we'll just have to wait and see. This transmission was originally in a TVR 2500, so it will be seeing drastically different duty in the estate.


Speaking of projects, here's another one. I took apart one of the Stag front strut assemblies that Dave, the best Triumphguy I know, was kind enough to find for me. This had spent some time in a junkyard, so I wasn't expecting too much, but I did learn the following:


  • I need to use my stronger spring compressors when undoing the castellated nut at the top...which won't be hard now that the weaker version was bent by the spring (no injuries, thankfully)
  • The almost 40-year old bond between the rubber and metal of the upper portion must be of a very high quality, because even on the Stag units that look a lot worse than the ones off the wagon, the bond is still very strong
  • I am unable to open up the strut housing (probably a good reason why Chris Witor says this isn't a DIY job) so I will be purchasing housings that have already had the cartridges replaced
  • Finally, since I can easily compress the Stag strut with one finger, any thoughts of using the existing struts went out the window.

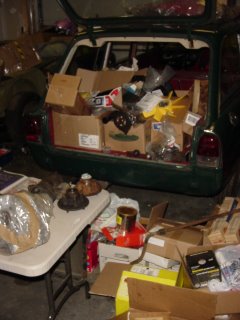
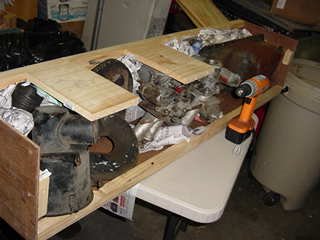
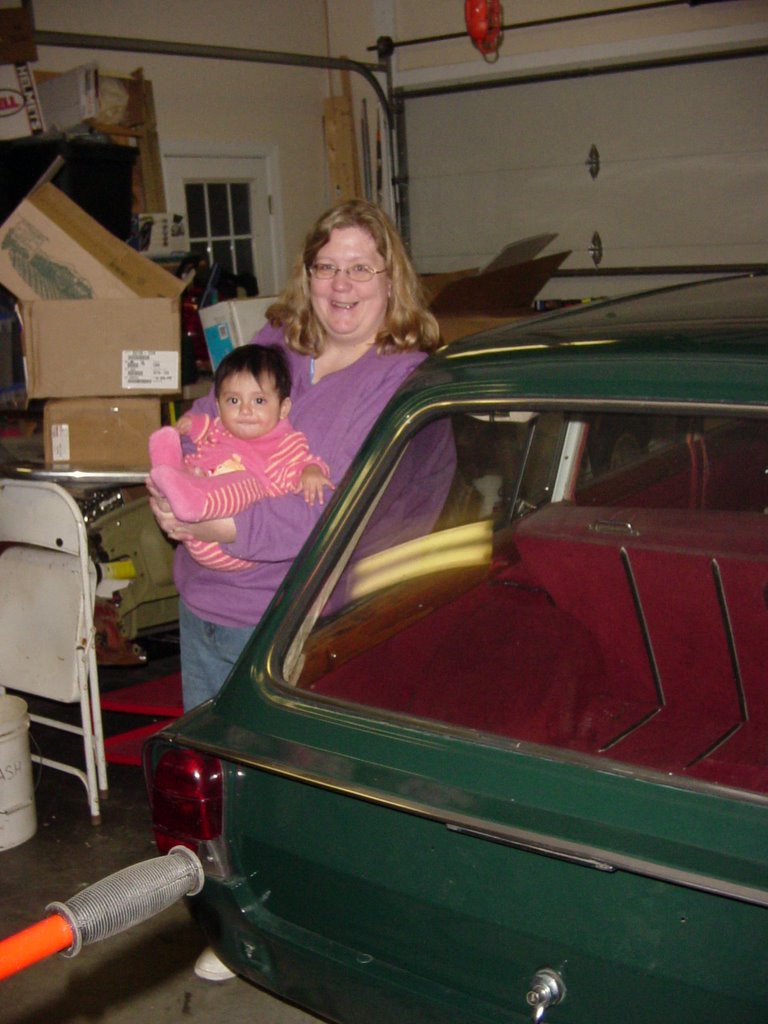
Finally, I wanted to show the stockpile of parts waiting to be attached to Chrissy...can't wait for some time to actually install some of them! Good thing she's got a lot of storage space!

Saturday, April 29, 2006

Gathering Pictures


Vern Brannon drove his 2000 saloon daily driver to the Gathering. Vern really does drive this car daily. I believe it came from Oregon as it has a PTOA sticker on the back window.

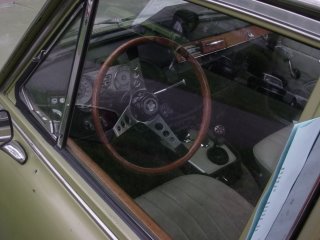
I hope at some point to get a steering wheel like this one for the Estate.


There's an interesting story behind the tear in the hood sheetmetal (visible just to the side of the "hood scoop"). Apparently Vern was driving the car one day when the original fan blade lost a blade...which left, rather rapidly, while creating the tear along the way. Vern has since replaced the fan...and this led me to buy a TR250 fan for Chrissy.

As far as progress on OUR car, I've done some more blasting and painting, but there's a lot more to do. I'm still struggling with the eventual brake specifications. At this point, I'm leaning towards a Stag M/C, Stag front brakes, and possibly putting a proportioning valve into the system to keep the rears from locking up rather than replacing the rear brakes with Stag brakes. Anyone got any experience with proportioning valves? They seem pretty affordable on eBay. I've also acquired some more parts off the list that never seems to end...but will eventually.

One more thing...it's lonely out here. If you read this, please post a comment so that I know you did...:-) Thanks!

Jamie

Monday, April 24, 2006

Update...but not much to report

It's been pretty busy lately with the TCOC's main event, The Gathering, which was last weekend and was a great deal of fun!

The latest issues are how to rig up the throttle (I'm going to try a late Spit 1500 cable attached to a highly modified RHD pedal assembly) and what to use for a brake master cylinder. At this point I'm going to start off with a NOS 2000 master cylinder...but that may create a "long" pedal with the Stag front calipers. We'll have to see. If I have to go to the Stag brake M/C I'll have to relocate the clutch M/C in one way or another. Two solutions were posted to my question on the forum, one to move the cylinder over, one to create a part that relocates the cylinder forward and to also extend the pushrod. We'll have to see.

Also, my friend Doug from Durham has offered to help me figure out a way to get more gauges into the dash without it looking horrible. I really want a tachometer, and I would prefer a voltmeter over the ammeter.

More to come, I'm sure...

Wednesday, April 12, 2006

Aussie Parts Arrive!

Yea! The parts from Australia are here! Here's the box from Andy:

Note the "This way up". The box was very solidly constructed, and I can at least say that the local DHL delivery folks did pay attention to the directions...it was in my driveway that side up!


I eagerly unpacked the box (LOTS of screws):


I now have in the garage awaiting cleaning, fettling and installation:
SU carbs, linkage and manifold
Gas, brake and clutch pedals
Remote air cleaner assembly and ducting
Sump for 2.5 engine
Engine mount spacer plates

And the bumper and sidelamp have been repacked and sent on to Stephen...

Now to find some time!

Tuesday, March 28, 2006

Here's the latest progress

As you can see from the picture below, the front suspension and brakes have been removed from the car:

It's a lot easier to deal with than the TR series, that's for sure.

Here's what the springs and struts look like. I think it's strut replacement time:
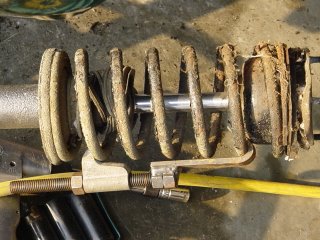
Most importantly, Chrissy now has a transmission, and the TR6 has regained an engine. Brian (on the left in the picture) was kind enough to sell me the engine and transmission from his 1973 TVR 2500M, which has a small-block Ford in it's future (!)

Thanks to both Brian and David for helping me pull the engine and tranny last Saturday. Now, to mate the TR6 tranny with the overdrive and mainshaft coming from New Zealand... :-)

Tuesday, March 21, 2006

We're getting closer! Parts continue to arrive (thanks to eBay and TRF) and I'm starting to refurbish parts. The steering rack was pronounced "good to go" by Kevin Andrews of Wayne's Alignment last weekend at the TCOC tech session and new rack boots are waiting to be installed.

As Triumph Stag parts are much easier to come by in the US, I will be using suspension pieces from a Stag to add an anti-roll bar to the front of the wagon as they are apparently interchangeable with the 2000.

Triumph had an interesting way of shoehorning the larger 2500 engine into the 2000 engine compartment. They moved the mounting holes for the engine 1" to the left (since they are on angles, it actually results in a 0.6" movement) and added spacers to the right side of the engine (as seen from the driver's seat) to rotate the engine back to level. Here's a diagram that Andy drew explaining it to me:


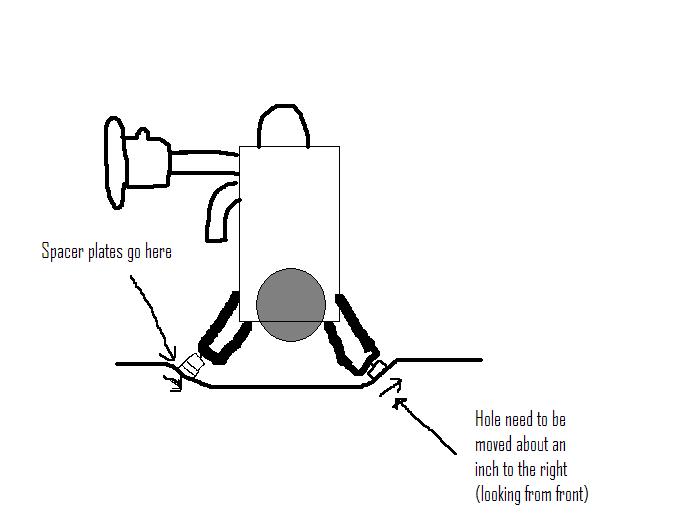
Down below this is the move I will have to make with the mounting holes. There's really not enough material to just drill, so I'll be adding some metal as well....break out the welder!


I have to point out that the sedan/estate front suspension is much simpler and easier to work on (as long as you have a suitable spring compressor) than the TR series...at least in my opinion. It was nice being able to drop the whole thing at once...

Until next time!

Jamie

Saturday, March 11, 2006

Yet another green and red sighting...and more work done!

Saw a post on the Club Triumph board about a '67 Mk. I estate for sale in England, so I followed the link. Yet another Conifer Green/Matador red combo! What gives with this color scheme???

Ok. I've actually gotten some work done in the past couple of days. Pulled the pedalbox, pedals and brake booster, blasted and repainted them along with the replacement harmonic dampener for the TR6 engine. Today, the front brakes and most of the front suspension got removed/cleaned. Definitely going to need some new bushings, but there must have been some recent work done on the brakes; the calipers look rebuilt with new pistons, the ball joints are new, and I think the tie rod ends are also. Good old Timken bearings that look good enough to clean and reuse, and no bad surprises.

Monday, March 06, 2006

Tranny woes!


Ok...for future reference for all you big Triumph fans out there...a Stag BW35 is not the same as a 2000 BW35. You can see the pictures here to the right, the 2000 is above the Stag. Although they look similar, the Stag input shaft is 1/4" longer and slightly larger in diameter. This means that it WON'T fit into the 2000 torque converter (I tried)...and it means that I'll be punting and looking into a manual transmission conversion. Eventually its what I would have liked to do anyway, but I really didn't need the headache now. Thankfully, there's a terrific Triumph guy named Andy Thompson in Australia who's helping me with the carbs, intake, oil pan and the other items that it takes to fit the TR6 engine. Here's a picture of "my" carbs that he posted to the Club Triumph forum:

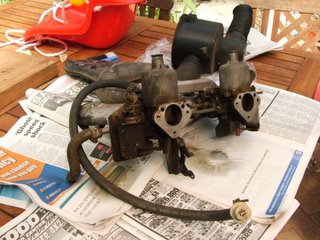
Also, Ian Priestley in New Zealand is working on putting a package together with the overdrive and mainshaft to convert a standard TR6 tranny to work with a 2500 A-type OD unit. Finally, I hope to get the engine and transmission from my friend Brian Kelly's TVR 2500 that he's converting to a Ford V-8 unit.

So...here's hoping that "a plan comes together!"

Tuesday, February 28, 2006

Talk with previous owner!

Today, I made contact with Steve, one of the past owners of the estate, from New Paltz, NY. I appreciate the time he took to fill me in on some of the earlier history of the car. Apparently, Steve found the car outside a service station where it had apparently sat for some time, victim of neglect and a mild collision. After Steve bought the car, he replaced the "nose cone" and acquired another front bumper. He also swapped out the front seats with those from another car. He added wheels from an MGB (the ones that appear in the pictures). Once he got it back to the house, he couldn’t get it started…"drove him insane". He removed head, decoked engine, etc…and it still wouldn’t start. Finally, he found that the engine had very little compression. He then put a TR6 engine in, had to change oil pan to make it fit. Steve drove it for a while, he commented that it drove nicely. After about a year, he sold the car to Vern, whom I bought it from.

So...as the parts roll in from eBay, the saga continues. Now if only I could find some more time!

Wednesday, February 22, 2006

Anyone want to join in the madness???


There's a nice looking 2000 SEm sedan (one of the ones with all the additional features) for sale on eBay right now.... <http://cgi.ebay.com/ebaymotors/ws/eBayISAPI.dll?ViewItem&item=4614114125>

Thursday, February 16, 2006

Green...and red???


Now that I know that the conifer green and red interior are original...as in it left the factory that way....

It STILL isn't growing on me.

However, I did find a period advertisement that shows that someone at Standard-Triumph liked the color (colour, I suppose) scheme....

Wednesday, February 15, 2006

Stag tranny coming

Two big items of progress:
1. Thanks to Andy down under, a conversion kit to help the 2000 become a 2500 is being assembled for shipmnent.
2. A rebuilt BW35 has been purchased off of eBay and will soon be heading to NC from Buffalo, NY.
Now, on to find a torque converter.... :-)

Sunday, February 12, 2006

Ok...Now I know more, but it just raises more questions...

OK...more information:
I received the BMIHT package on the estate, and it's only raised more questions... -- The car was built 24-Oct-1967, despatched 17-Nov-1967. -- Destination was "Personal Export Delivery for Mr J. W. Hanes, c/o Standard Triumph Eire Limited (does this mean that Mr. Hanes was just an individual in Ireland, or did he work for Triumph in Ireland?) -- under "Other Information", it states that "This vehicle was originally issued with the Coventry registration mark NHP455P"...so I guess this means that Mr. Hanes drove the car in England prior to ????

Can anyone shed any light on the above?

Finally, I've made the decision to pursue the TR6 engine option. Consequently, I need to ask Chris Witor about obtaining the following from a 2500:
1. Oil pan
2. Intake manifold, carbs, linkage, air filter housing, skinny air chamber, mounting for housing, etc.
3. I'm still thinking that the front plate, rear plate, and flex plate for the automatic will transfer.

If any of you think I need something else, please let me know.

NOW, I'm asking yet another question. Is the BW 35 from a Stag the same as the one from a 2500? I'm thinking the input shaft would be different if it were a manual tranny, but wouldn't an automatic be the same (just the two tangs on the torque converter?) If the bolt-on bell housing is different, I could use the one from the 2000. The reason I'm asking is that there's a rebuilt Stag BW35 on eBay for far less than I can get one rebuilt for...anyone's input is welcome!

Tuesday, February 07, 2006

Engine Stripdown

No pictures (yet) but some interesting items found during engine stripdown:
  • Rocker shaft, rockers, camshaft, lifters were absolutely pristine...must have been replaced
  • Timing chain has more slack than I've ever seen on a Triumph engine, tensioner worn out
  • 1 main bearing through to copper (why just one?)
  • Rod ends and rods were engraved but miss-matched (1 on 2, 2 on 1)
  • Rod bearings looked OK
  • Thrust washer in rear was HAMMERED...leads me to believe it was in a manual tranny car at some point
  • Pistons had terrible galling, but on a 45-degree angle from either axis (weird...)

So...now I'm looking eagerly at the TR6 engine, already rebult, sitting there...and going hmmm...

I've asked for help on two UK Triumph sedan sites, hopefully I will get some help before going further...

Monday, January 30, 2006

What do we have here?

Well, after splitting the tranny and engine apart in the wee hours of Sunday morning (Ally was kind enough to wake me at 4 am), all is not well. The torque converter is supposed to have two "tangs" on the backside that engage the pump in the tranny. One tang is not there at all, and the other looks like it's been welded back on...so...I know I'm on the lookout for a Borg-Warner type 35 torque converter at least. On the bright side, it helped having a multitude of manuals (thanks eBay) to figure out how to get the tranny separated. Also, nothing to concern me about the engine yet...

Monday, January 23, 2006

Now with pictures of OUR car...


Here are some shots of OUR vehicle, and, more importantly, our daughter with the vehicle she's responsible for! Ally apparently is at least OK with the car based on facial expressions... :-)

Wednesday, January 18, 2006

She's home!


On Monday, 1/16/06, Cheri, Allyson and I picked up our new "family car" from Vernon Brannon in Charlotte, NC, and towed it back to Raleigh with the trusty Durango. Pictures to follow once I take them, but on the left is the factory brochure.