Saturday, December 15, 2007

I'm Not Using a Sawzall Anymore!

For a long time, it seemed that the last tool I used on the car was always a "sawzall" (a power reciprocating saw if you aren't familiar with the term). Now, it's starting to go back together. I haven't touched the car in December (and probably won't until January), but wanted to post some pictures of where we are. I had to visit Harbor Freight tools to get enough vice grips to hold the front end together to take these shots. I fabricated the silver pieces using 2X4's in a vice and plain sheetmetal...basically they were to fill up the space between the other two pieces. Thankfully, they will be behind the grille! But at least it looks like they fit OK. Here's some closeups as well. You'll see I still have some beating and pounding to do, especially on the ends of the brown nosecone part. I think I'll have to tack the top edge first and then alternate persuading with tacking as I go around.


Thursday, September 27, 2007

Another one for sale & more bodywork progress


Here's another chance to join me in my madness...there's another sedan for sale on eBay. It may not have as solid bodywork as the last one I posted did, but it sounds much better mechanically. I wonder why they took it off the road?
BTW, while I'm thinking about it, if anyone out there has a really nice trim piece for the fake hood scoop I'm interested. The one I have is quite pitted, but I'm not sure I'm willing to shell out $100 or more for the reproduction ones that appear from time to time on eBay.
If you're interested in the sedan, here' s the link to check the auction out:
As far as Chrissy (my car) goes, right now the nose, lower valence and two new panels I fabricated for between them are being held on by vice grips. I had to make a trip to Harbor Freight tools to get enough...but it's nice to see the car starting to look complete again. There is still some shaping work to do to make sure all the panels lineup but I hope to get to some of that this weekend. Once all trimming and tapping is done, I'll take the panels off one more time, protect everything I can with paint, reposition them back and start welding. That should take some time and I'll definitely need some help with holding part of the nose in the right place. I'm also going to be welding up the holes for the original nose badge as it won't be reinstalled. I've never really cared for it, and as the "TRIUMPH" letters will still be there I think that's ornamentation enough for now.

Sunday, September 09, 2007

Reconstruction at Last!

Finally! After many nights of pounding, copious applications of sanding, elbow grease and POR-15, as well as my humble attempts at welding, the "under the nosecone" section of the Estate was finished today. It's a terrific feeling to be putting the car back together instead of deconstructing. Now, on to the side panels just below and to the outsides of the center portion. I'll have to temporarily position the nosecone, lower valence and grille to get the spacing right for the paper patterns.

No, the welding is nothing pretty, but it is strong. I wanted to make sure that if the car was ever in an accident again, the front would hold up at least as well as it did when it was new. I'll be carrying my wife and daughter with me and I can't imagine more precious cargo.

You can see from this closeup shot that I actually ended up replacing the entire corner of the piece. What you can't see is that both the front and side edges are formed under to create a flange for other parts to weld to. The front flange was OK...the side flange didn't exist...so I measured the other side carefully (assuming IT was right...) and tried my best to match up with it. We'll see how the nosecone fits. Just laying it up there this afternoon it looked pretty good, but once I clamp things into place I'll know for sure. That's it for this installment; more soon I hope!


Sunday, July 29, 2007

OH, what a deal....


I'm probably lucky this isn't in North Carolina...a RUST-FREE saloon just surfaced on eBay. At this point it's $300 no reserve. AAARRRGGGHHH!


Here's the link. Good luck to someone living near Oregon...

<http://cgi.ebay.com/ebaymotors/1966-Triumph-2000-Saloon-Rust-Free-Complete_W0QQitemZ150146351634QQcmdZViewItem?hash=item150146351634>


Having visited the hospital this week as a patient, I have no other news to report. I'm feeling fine now so hopefully there will be more progress this week... :-)


Jamie

Monday, July 16, 2007

Back to work with rusty metal...


I'm getting used to seeing old rusty metal at night. Here's to getting rid of it one way or another!

It's been a while since my last update. Here's some of the parts purchases:


A NOS front lower valence...I just LOVE the old Stanpart label. Don't know if I can save it but I'll try...


A NOS front nosecone. Nice eBay seller packaged this really well from England.


A set of 7X15 wheels. Yeah, they're LOUD, but the color ought to work well with the cream paint and red interior. Thank heaven for the upsurge in AE86 Toyota drifters that have the same bolt circle and offset as TR's.... :-)


So, where we last left the project I had to attack the nose. First, one half came off:


Which was enough to expose that there was a lot more work to be done. Then, the other half came off. That's the new nosecone below:


Unfortunately, I'll be creating some panels myself using the old cardboard and transfer method. You can see why here:


Yes, there's actually supposed to be sheetmetal there. Oooops. I only wish that the "craftsman" that did the previous work actually was one.
I'll try to update sooner. Maybe by the next post I'll be attaching rather than detaching!
Jamie


Thursday, April 26, 2007

It's been a while...

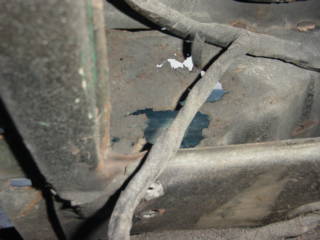
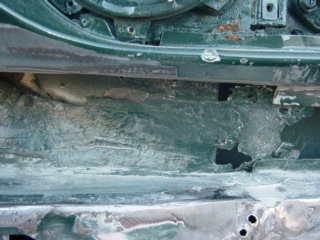
Back from the Gathering (see StormBear's blog on the right for a great report and some beautiful pictures) and I want to get back working on the car. Well, as you can see, we've accomplished much (not!) since the last post. However, I've answered enough questions about "where is the car" that I figured I'd better update the blog. The good news is that I have some new sheetmetal, and I am progressing with cutting out the old metal. You'll notice in the picture above that the lower valence is no longer attached to the car. Contrary to what you may think, this is actually a good thing. The original valence had much bondo and bends...now there is a genuine NOS Stanpart lower valence panel waiting to be welded on. And the nose panel, also a NOS Stanpart panel, has arrived from England. The large box on the hood contains parts from Chris Witor from England, the only specialist I'm aware of in parts for the 2000/2500/2.5PI line. So far, I've sourced just about everything I need except a driveshaft...even new weatherstripping hasn't been an issue.

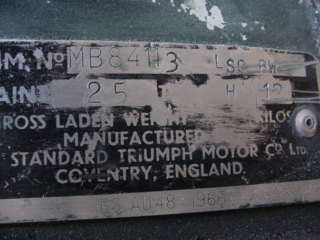
I'm shooting to have the car completed by November...that will be the 40th anniversary of it's delivery! With all new polyurethane bushings, the Stag anti-roll bar, new shocks and struts and 15" TR6 wheels, the car ought to feel pretty good on the road. The Stag front brakes (Ted Schumacher of TS Imports is rebuilding mine right now) should help keep it safe, along with the new seat belts.

Since my daughter Allyson will be spending a lot of time in the back seat, Cheri and I are currently considering installing a DVD player in the roof...I'll bet, if we do it, that it will be one of the very first times one's been installed in a 2000. BTW, although it's really not correct, I've started to refer to the car as the 2500, since that's really what it will end up being.

If you take another quick look at the photo at the top of this entry, the TR6 engine on the left hand side of the picture is what will power the car. As I recall (it was rebuilt over 10 years ago but has been turned over and kept oiled since) the engine was balanced, slight shaving of the head, 20 over pistons and a "stage 1" cam that was only slightly more aggressive than stock.

Enough for tonight. I hope to show real progress by the next entry!
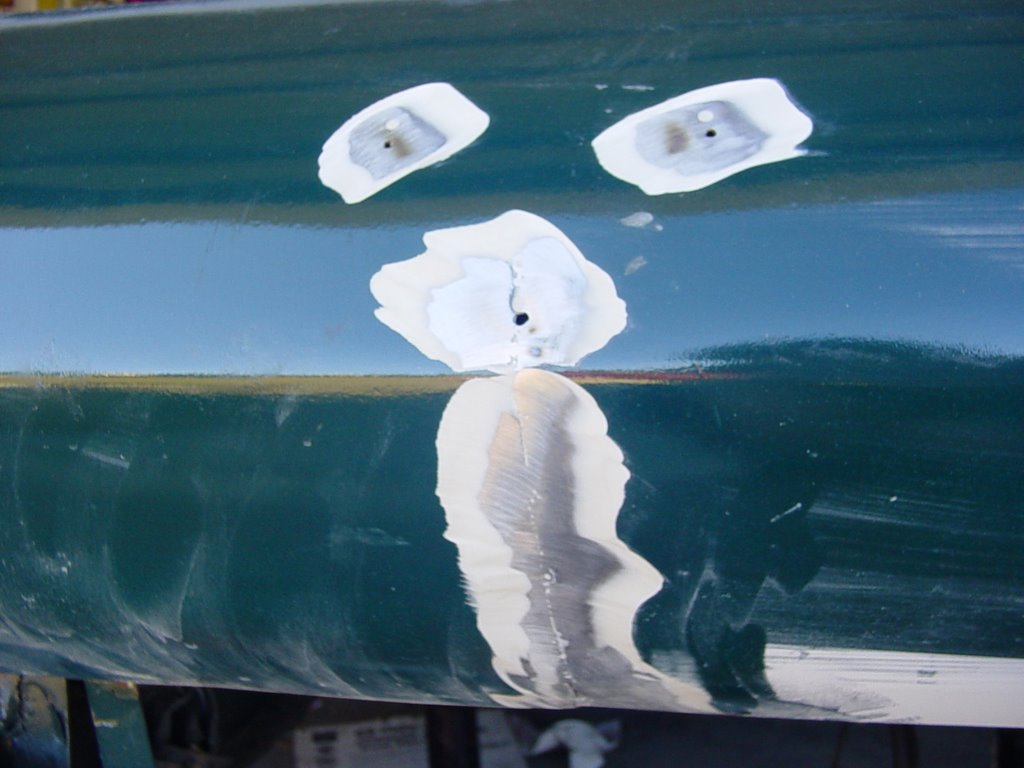
Wednesday, March 07, 2007

Some welding repairs


These were actually taken before the priming, but I thought they were worth it from a contrast standpoint with my foolish attempts to weld the existing metal back together. Now, I have a real battery box...
The moisture is from coating the box with OSPHO...I'm using that stuff on the advice of someone that knows a lot more about this type of thing than I do.
It's SO nice to actually be putting parts on rather than taking them off!
The NOS valence came in, and it really is NOS, down to the Stanpart label! Only one major part to come by now...a manual driveshaft.


Tuesday, February 13, 2007

Wow! Some primer applied!!!

Over last weekend, finished the welding on the battery box and both sides of the front panel that the radiator bolts to...treated everything with Ospho and actually primed 3/4 of the engine compartment. Unreal, it's the first thing in a long time that I've done to the car that wasn't taking something off.

I'm hoping to take vacation again this Friday and will try to accomplish some more. I just won an auction on eBay for a NOS front valence, which as you can see from the pictures Chrissy needs pretty badly...

Gotta get her on the road!

Jamie

Friday, January 19, 2007

Pictures from recent work

The first couple of pictures show the metal as it was left by the previous "bodyman." Actually, that's not quite true as I had already done the rough straightening before I took these pictures.

Picture 1 shows the radiator support panel, now roughly straightened and welded back together, along with the back side of the "nosecone." You should also note the cut in the grille support thoughfully supplied by the previous "bodyman."

Picture 2 is a shot of the same area on the other side of the car from a more vertical angle. You can also see the holes left in the support. These will be stabilized and fixed.


Picture 3 is the battery tray after A LOT of pounding and welding. I still have a few pinholes to fix here.
Picture 4 is another shot of the area in picture 1.
Picture 5 is another shot of the sliced grille support. It will be re-welded after reshaping the opening is complete.
Picture 6 shows the area under the LH headlight. The fine, smooth surface you see was deemed enough by the previous "bodyman" and was left for painting. Needless to say, it won't stay that way.

Pictures 7 and 8 show the commission plate and the two body number plates. I found the upper body number plate interesting...especially the low number, 51. Any idea if this plate was fitted to special order cars like this one?

Hope you've enjoyed the latest look...I hope to get back to the car in a few weeks!

Finally, a little progress!


I can't say there's a lot that's been going on with the estate lately. Between my new job and a lot of sickness in the family, plus the holidays, there just hasn't been a lot of time. I did find about four hours to work on the car between Christmas and New Years, though. After finding out that the "new" nose that had been put on the car was installed over some...less than pristine (diplomatic enough?) bodywork, I kept going. Managed to weld up most holes, still have a little to go, bent the battery tray and radiator support panel back into shape, and did the rough reshaping of the grille opening necessary to fit the grille back in! Apparently, it was a better idea at the time to flatten the grille instead of making sure the opening was the stock height. Consequently, I've used a scissors jack and some planks to jack the opening back to it's correct height (!). The pictures tell the story...