Tuesday, September 26, 2006

Mock Dash Layout


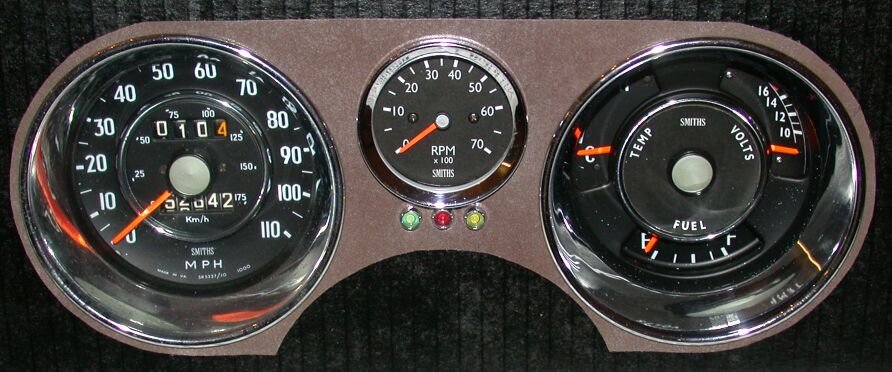
Doug's been busy again. At the same time that I was trying out a pattern for the "new" gauge section of the dash, he was putting the reworked gauges into a mock dash setup for my approval. Needless to say, he got it!

Tuesday, September 12, 2006

Time for an update!


From left to right:
Existing speedometer, cleaned up
Tach, created from scratch including "SMITHS" face
Triple gauge, with voltmeter replacing amps.

WOW!

And these aren't even the real faces yet...just paper copies temporarily placed.

I can't thank Doug enough. Next, we're (he's...I'm just support) taking on converting one of the rectangular MGB oil pressure gauges to look like these and mounting it where the ash tray used to be...

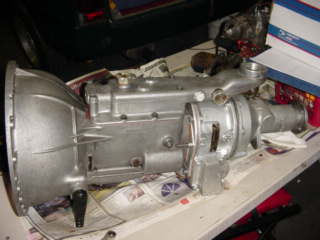
Here's the picture of the finished transmission I forgot to take and load last time...


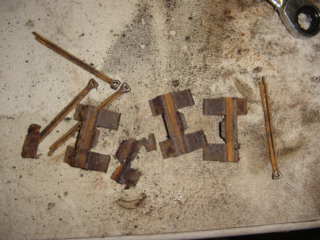
Believe it or not, this is the rusty remnants of the pins and spring clips that held the pads in place in the Stag calipers. You can imagine what the calipers looked like. They've been cleaned, I've bought some used but good pistons to replace the corroded originals that have been removed, and I'm awaiting a seal kit to try to rebuild the calipers. We'll hope that I can get by with a rebuild as a professional sleeving job is really expensive (although nice!).


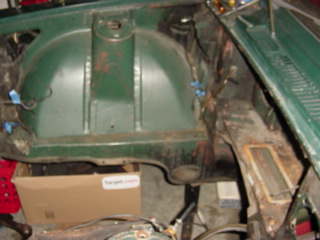
Finally, here's the gutted engine compartment. I have to decide what color the car will eventually be before putting the engine in so that I can paint this properly. Right now, since I must stay with the red interior, I'm leaning towards a creamy white or dove gray (grey?). Any votes out there, or other suggestions???


Jamie

Tuesday, August 29, 2006

More work done...

Finished the tranny (but forgot to take a picture of the completed assembly!) O/D installed, additional switch added to top cover (who has a 5/8-13 tap anyway?...thankfully, a metric one was close enough)


Here's the next rebuild job: a set of Stag calipers...at least I was able to obtain a set of good pistons for them on eBay...


Finally, a shot of the rear of the car. All the bins in the rear are filled with parts!

Tuesday, August 15, 2006

Pictures (2nd try)

Ok, here are the pictures I was having difficulty posting...

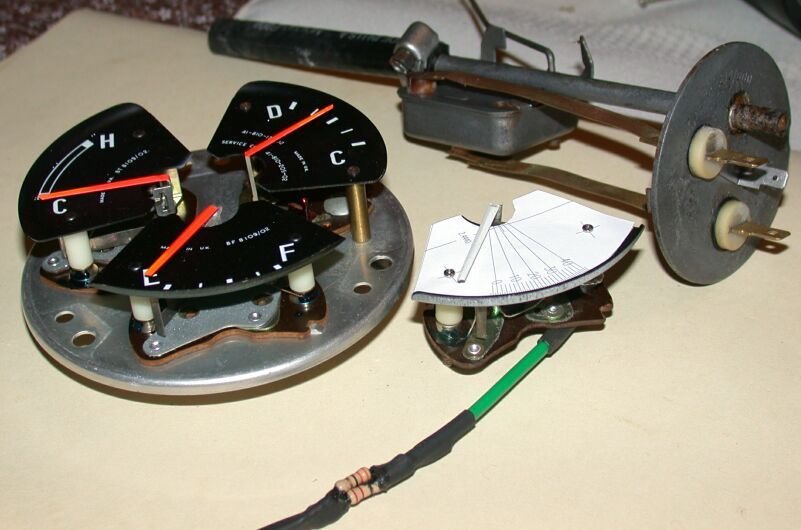
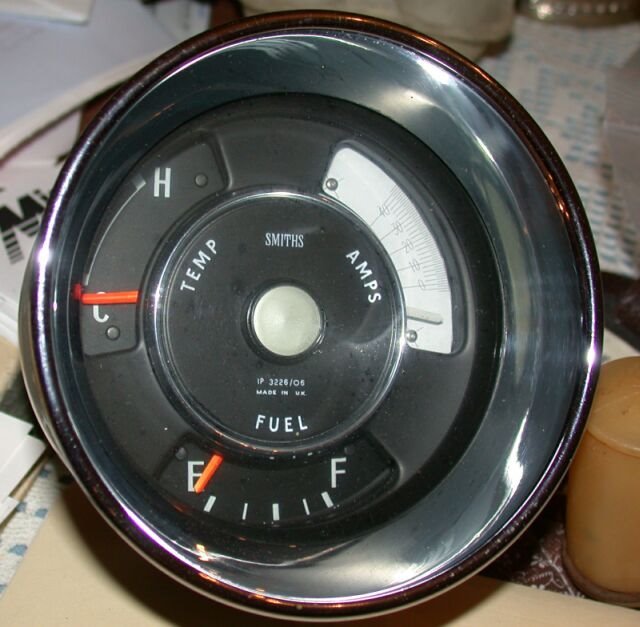
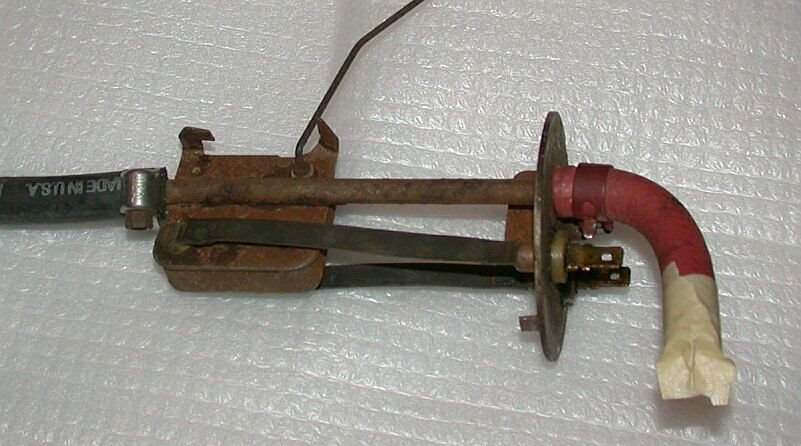
First one is of the sending unit before Doug's cleaning/refurbishing. Second, one of the disassembled triple gauge, fuel gauge that's being turned into a volt meter, and you can see the cleaned (and now functional!) sending unit in the background. Finally, the "new" gauge temporarily put into place.

Doug has replacement graphics for the face and gauge planned. He really does phenominal work! By the time we have the 2" tach in place, the only other gauge I'd like to have is oil pressure. Since I don't smoke, maybe we can do something with the ash-tray part of the dash...

Jamie


Saturday, August 12, 2006

Miscellaneous Update

Not much progress as far as assembly goes...but...lots of parts acquisitions and some dash/gauge progress (thanks to Doug!). First, current assembly state.

This is the rough order of what I have to do to get the car back on the road (feel free to object/correct/suggest through comments!)
  1. Finish assembling the tranny (top cover/OD/nose)
  2. Pull already rebuilt TR6 engine from TR6 and put front plate & sump from 2500 on.
  3. Marry up engine/clutch/tranny
  4. Clean up and repaint underhood area (means deciding color for car, see below)
  5. Mount engine/tranny from underneath
  6. Re-install already rebuilt front suspension
  7. Install driveshaft coming from California (a deal I couldn't refuse, was planning on making one up)
  8. Turn used Stag rotors, rebuild Stag calipers and install front brakes
  9. Replace rear shoes/wheel cylinders/drums as necessary (have all 3 new)
  10. Replace flex brake lines
  11. Modify Mk. II RHD gas pedal to fit LHD Mk. I (may be interesting...)
  12. Coat fuel tank with liner after shaking chain for a while to break loose crud & clean
  13. Reinstal fuel tank and refurbished sender (thanks Doug!)
  14. Have radiator re-cored for increased cooling, because...
  15. the next step will be to install the new heat/A-C system (R-134) that Dave and I are designing
  16. Mount master cylinders/slave cylinder (have all new or rebuilt) and connect/fill/bleed/fill/bleed/fill/bleed/etc...hydraulics (DOT5, I'm not going racing)
  17. Rebuild HS 6 carbs (have kits) and install w/exhaust manifold
  18. Trailer to local custom exhaust shop for fabrication/installation
  19. Reinstall front seats and install new seat belts front and rear (already have)
  20. Cover split vinyl on top of dash and install new dash center/gauges/radio/etc
  21. Debug electricals (this could take weeks...I've never even hooked up a battery at this point)
  22. Debug engine/mechanicals (if there is a major risk here, it's the differential/halfshafts, I'll look at the halfshafts while underneath and do U-joints if needed, but I'm not touching the diff...car had 57k miles so I'm trusting it's OK)
  23. Any minor interior cosmetics
  24. Blast TR6 wheels, paint, buy/mount/balance tires
  25. Replace center emblem in TR6 centers and install
  26. Install new wiper arms/wipers (already have)
  27. Install bumpers
  28. I'm sure there's stuff I'm forgetting, I reserve the right to edit this post!
  29. Install child seat and let's go Triumphing!

Now, as to color choices. As previously posted, I just can't get into the green and red combination. Since I have a new red carpet set that came with the car, and the front seats are largely newly reuplolstered in red...and the rear seat is still in original red leather...I think I'm stuck with a red interior for the forseeable future. I'm thinking that leaves me with a limited selection of colors, especially since the body has some waves....so right now the leading candidate is a two tone combo of red roof/off-white body, using period colors. What do you think?

Parts...I've gotten a lot since my last post. For example, a NOS 2500 O/D shift lever (eBay), a pair of sidelight lenses (a kind-hearted British saloon enthusiast), speedo cable, NOS bumper overriders, Lucas Square 8 driving lights, front wheel bearings, strut gaiters, u-joints, rear window heater kit, lug nuts, tie rod ends, side mirrors (all eBay) have all found their way into the garage.

Finally, here's some of the work Doug's been doing on the gauges and dash. He's found that the triple gauge I purchased (supposedly from a later 2000) isn't exactly the same as the original, so we're going to have to create a voltmeter from another gauge. The pictures explain it better than I can, but I can't get it to load tonight. So I guess that will have to wait for next time!